
There’s a good chance you’re reading this in the Google Chrome browser, as it currently holds more than two-thirds of the global browser market share. Almost two decades after launching, it’s become the perfect browser for the modern web: fast in operation, uncluttered in its interface, and packed with intelligent features.
Some of those features can be utilized and tweaked to get Chrome running faster than it does in its default state—and you may not have come across some of these settings before. Even saving just a few seconds here and there can quickly add up over the days and weeks and make a genuine difference to how much you get done, so here are some top tips. [And, if you’re wondering what to do with the time you’ve saved, it never hurts to do a quick security checkup while you’re messing with Google settings.]
Turn on parallel downloading
Enable parallel downloading in Chrome, and it’ll attempt to download files in multiple chunks. It’s like having six cars using six lanes of a highway, rather than having them one in front of the other—you should get all six cars to the finish line faster.
To enable the feature, type “chrome://flags” in the Chrome address bar and hit Enter. Search for “parallel” in the box at the top to find the Parallel downloading feature, then set it to Enabled using the drop-down menu on the right.
Note that while Chrome may request several sections of a file at once, rather than the regular sequential method, the web server you’re connecting to may not allow it. However, when parallel downloads are permitted, they can make a real difference.
Load websites before you click on them
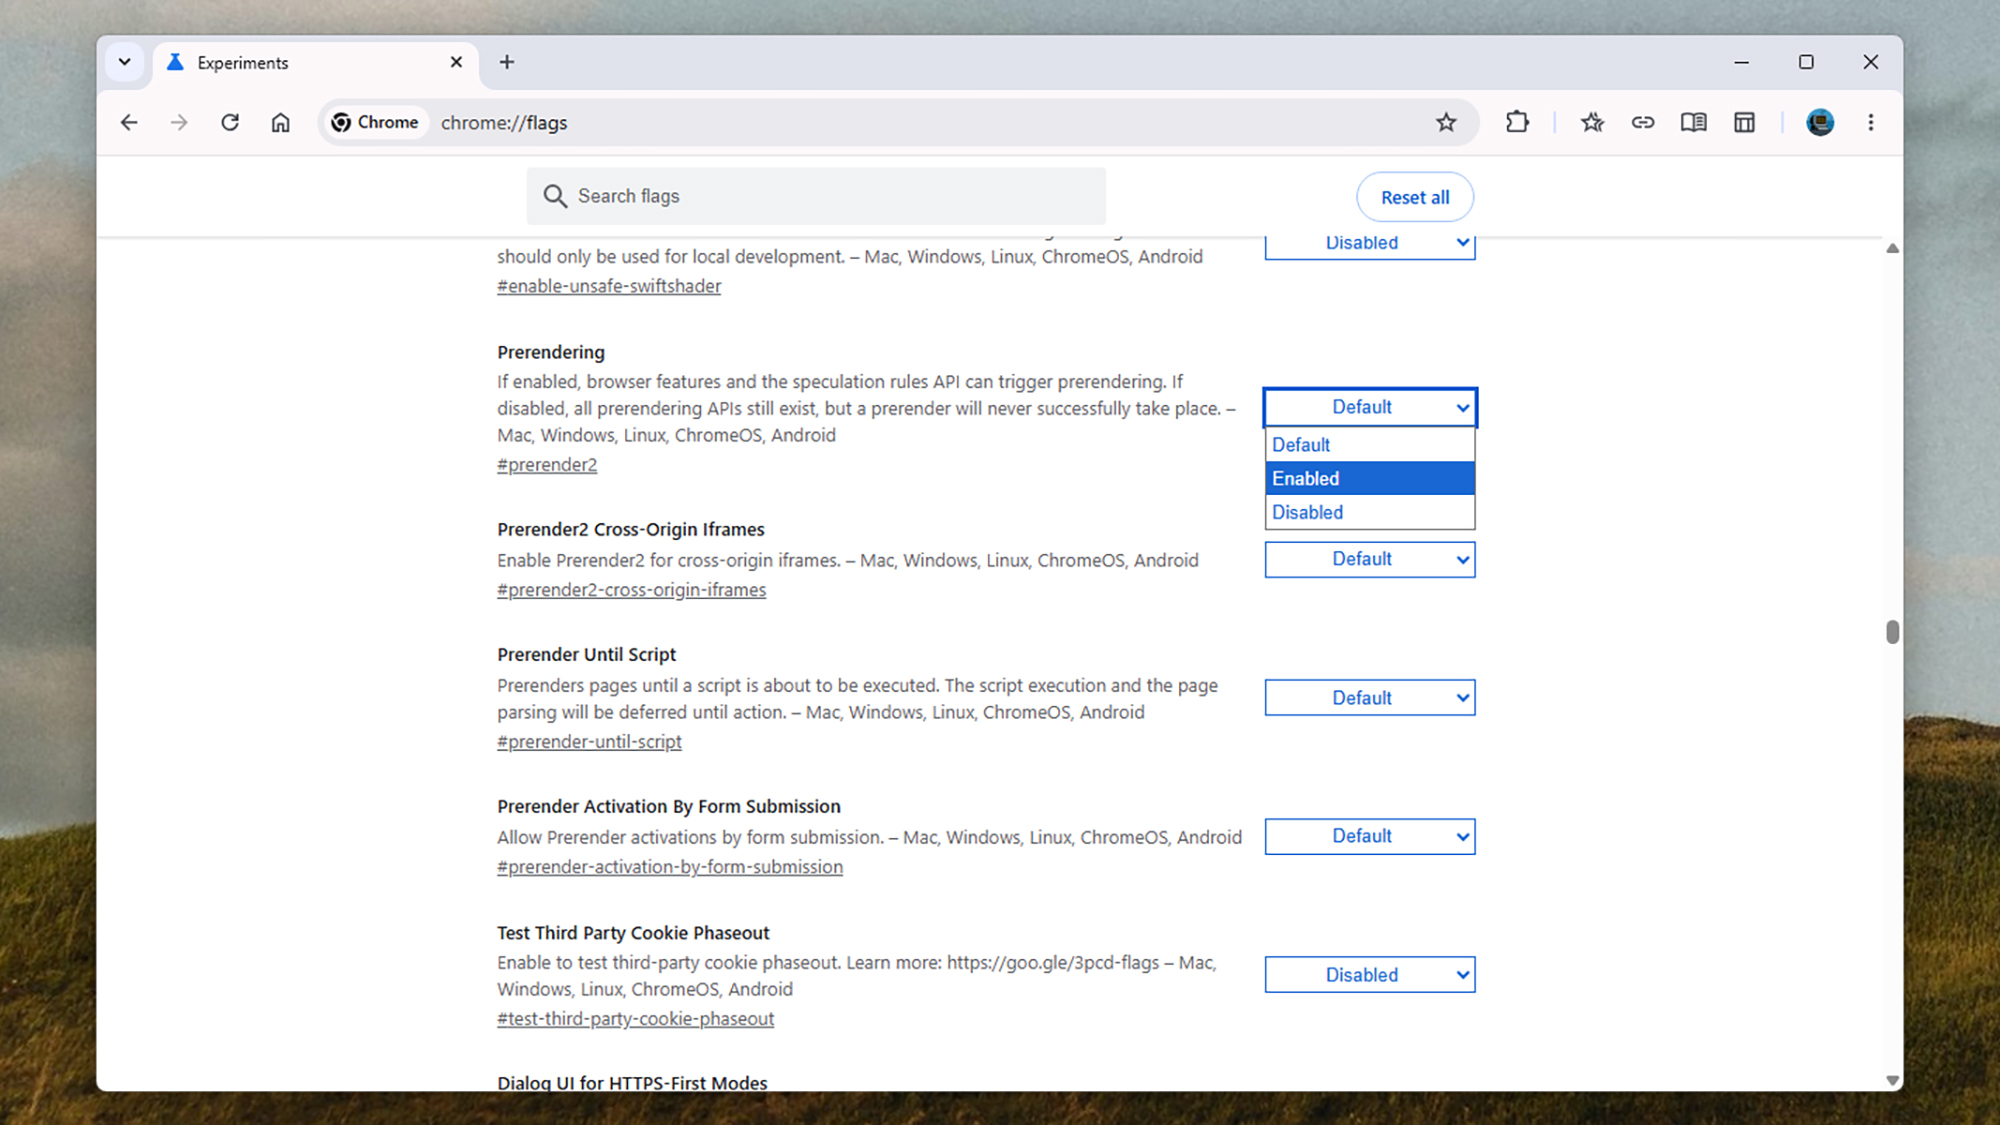
Chrome can enable a feature called prerendering, which essentially loads websites before you follow links to them. It’s based on a “speculation rules” standard, which looks for clues about what you’ll do next.
For example, if you start typing a website address into the Chrome address bar that you’ve visited a lot in the past, that page might get loaded in advance before you hit Enter. The rules might also look at where the mouse cursor is lingering on the page.
The browser won’t always guess right, but when it does, it can noticeably speed up your browsing. Type “chrome://flags” in the address bar, hit Enter, and search for “prerendering” in the search box—you can then set Prerendering to Enabled.
Turn hardware acceleration on (or off)
Head to Chrome settings by clicking the three dots in a browser tab (top right), then choosing Settings. If you then click System, you’ll see a toggle switch labeled Use graphics acceleration when available.
This offloads some browser rendering work to the graphics chip or card in your computer, and can speed up page loading if you’ve got a decent graphics setup in place. If you don’t, it can occasionally cause lag and glitches with page loading.
So, it’s worth turning this feature on if it isn’t already—or, if it’s already on and you’re seeing occasional problems with page loading, it’s worth turning it off. Keep an eye on Chrome’s performance and see if it makes a difference.
Enable the built-in Memory Saver
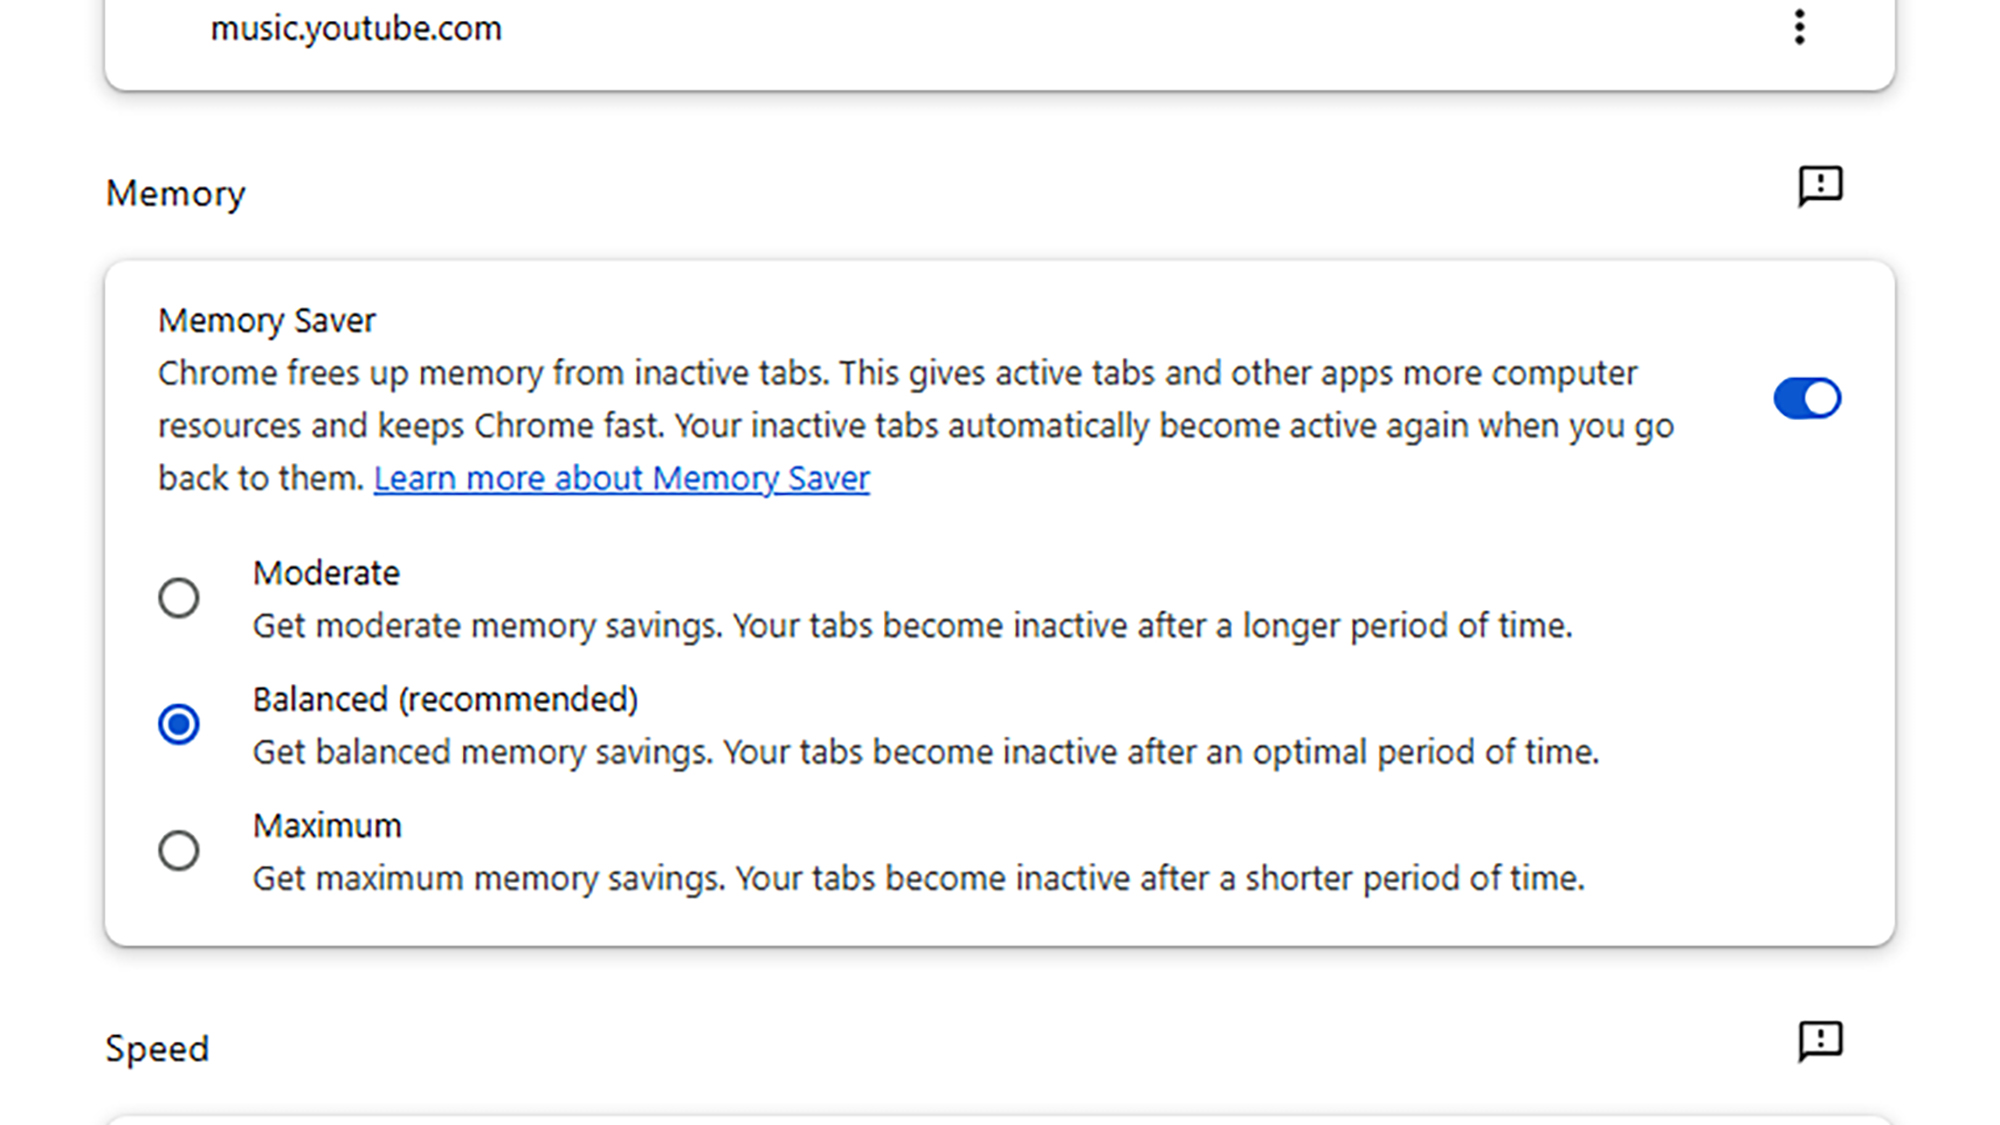
Google Chrome can quickly start to take up a lot of memory on your computer, especially as more and more tabs start to open up for a particular session. The built-in Memory Saver feature is intended to try to limit this problem.
Essentially, it deactivates tabs that haven’t been used in a while: The tab will still be there on screen, but Chrome won’t be actively monitoring or updating it (so if it’s a live blog, for example, you won’t see new posts appear).
As soon as you return to the tab, it’ll reload and become active again. Click the three dots in the top-right corner of any Chrome tab, then choose Settings > Performance to find the Memory Saver toggle switch, with three levels of control available.
Remove unnecessary extensions
Browser extensions can provide genuinely useful extra functionality in Chrome, but installing too many of these add-ons can negatively impact performance. These little mini-apps need to load up with Chrome and keep tabs on what you’re doing online.
Removing extensions you no longer use or think you can do without can restore some of the original speed Chrome had when you first installed it, and it’s good from a security perspective too: It means fewer ways for bad actors to get at you and your data.
You can run a Chrome extension audit by clicking the three dots in a Chrome tab (top right), then choosing Extensions > Manage Extensions. For any add-ons that you’re not actively using, click Remove and then confirm the action.
The post How to speed up Google Chrome downloads, and 4 more tricks to make your browser faster appeared first on Popular Science.
from Popular Science https://ift.tt/wzeukrx


0 Comments